

Repairing a water-damaged ceiling takes four jobs, in this order: stop the water, dry everything above and below the ceiling, replace whatever can’t be saved, then prime, texture and paint. Skip the first two and the stain comes back, often with mold. If the ceiling is sagging, has been wet for more than a day or two, or the water was dirty, treat it as a restoration job and not a paint job.
TL;DR
- Find and stop the source first. A patch over an active leak fails every time.
- Drywall that stays wet beyond roughly 24 to 48 hours is at real risk of mold, so dry fast with fans and a dehumidifier.
- Sagging, bubbling, crumbling or stained-and-soft ceilings usually need cutting out. Firm, dry, lightly stained ones can often be sealed and repainted.
- Photograph everything before you touch it, and report the loss to your insurer promptly.
- Wet insulation, widespread damage or visible mold is the point to bring in a professional crew.
Table of Contents
- What to do in the first hour
- Finding the source of the leak
- Repair or replace: how to judge the drywall
- How to repair a water-damaged drywall ceiling
- Ceiling leaks and mold
- When to hire a professional
- Insurance: what to document and ask
- Our perspective
- Get the ceiling dried and rebuilt in one call
- FAQ
- Sources
What to do in the first hour
Stay calm and work from the ceiling down. A calm, ordered response protects both the room and your claim.
- Protect people first. If the ceiling bulges, don’t stand under it. A bubble full of water can release it all at once. Poke a small hole at the lowest point of the bulge with a screwdriver, with a bucket underneath, so it drains in a controlled way. If water is near light fixtures, outlets or a ceiling fan, turn off power to that area at the breaker panel before you do anything else.
- Stop the supply. If you suspect a plumbing line, shut off the main water valve. A burst or leaking supply line will keep feeding the damage until you do.
- Move contents. Get furniture, rugs and electronics out of the drip zone, or cover them with plastic.
- Document. Take wide and close-up photos and video before cleanup. Don’t throw away damaged items until the adjuster has seen them, which matches Texas Department of Insurance guidance on filing a claim.
- Start looking for the source. Forbes suggests starting with a bathroom above, water lines in the attic, or the roof.
Finding the source of the leak
The stain is rarely right under the leak. Water travels along joists, pipes and the top of the drywall before it shows up, so the visible spot can be several feet from the entry point.
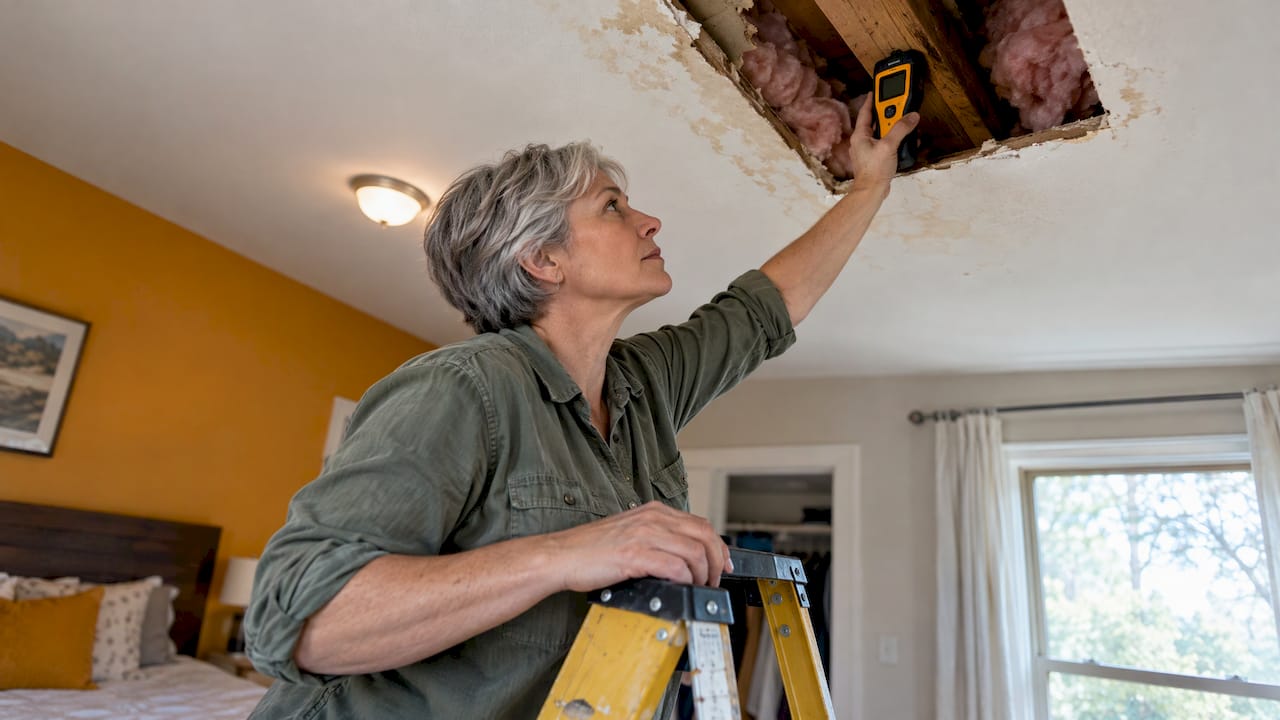
A moisture meter helps. The Home Depot’s repair guide recommends using one to find the area with the highest readings, then inspecting the floor, attic or roof above for plumbing or roof problems.
Use the pattern of the stain as a clue:
| What you see | Likely cause | Where to look |
|---|---|---|
| Stain that grows only after rain | Roof, flashing, vent boot or attic condensation | Attic underside of the roof deck, around penetrations |
| Stain under a bathroom or kitchen | Tub, shower pan, toilet seal, dishwasher or supply line | Bathroom or kitchen floor above, access panels |
| Stain that grows steadily in dry weather | Pressurized supply line or HVAC condensate | Pipes in the ceiling cavity, air handler drain pan |
| Ring stains in a pattern along a line | Slow pipe joint leak | Along the run of the plumbing |
If the roof is the culprit, get it sealed before any interior work. For a deeper look at tracing roof leaks and what repairs typically involve, see this guide to roof leak repair and costs.
Repair or replace: how to judge the drywall
This is the decision that determines your cost and your mold risk. Two professional and government sources agree on the basics.
The Gypsum Association’s GA-231 guidance on assessing water-damaged gypsum board says wet board should be replaced unless all of these are true:
- The water source has been identified and eliminated.
- The water was uncontaminated.
- The board can be thoroughly dried before mold growth begins, typically 24 to 48 hours.
- The board is structurally sound, with no rusting fasteners, paper delamination or physical damage.
The EPA’s Table 1 on water-damaged materials adds that wallboard can be dried in place only when there is no obvious swelling and the seams are intact. Otherwise it should be removed and replaced. Ceiling tiles should be discarded. If mold has already grown or materials have been wet more than 48 hours, the EPA points to its more demanding mold guidelines.
The Department of Energy-funded Partnership for Advancing Technology in Housing says ceiling drywall can stay when it was wet only by clean rainwater, isn’t sagging, isn’t mildewing and hasn’t lost its smooth texture. It also notes that wet insulation must come out for the ceiling to dry properly, and that plaster pulling away from its wood lath means that whole section should be removed.
A quick field test
| Condition | Usual call |
|---|---|
| Faint brown stain, firm, dry, no smell, leak fixed | Seal with stain-blocking primer and repaint |
| Soft spots, bubbling or bowing between joists | Cut out and replace the affected panel |
| Sagging, peeling tape or paper | Replace |
| Musty smell, dark or fuzzy growth | Stop, treat as mold, call a pro |
| Water came from a sewage line, or the ceiling has been wet for days | Replace and bring in professionals |
| Wet insulation above | Remove and replace insulation, then the ceiling |
If the framing looks bowed, the sag is wide, or water has been sitting for a long time, have the structure evaluated first. The same federal housing publication warns that reusing unsound materials leads to structural problems, mold and a poor appearance, and advises consulting a professional engineer if structural integrity is in question.
How to repair a water-damaged drywall ceiling
This is the do-it-yourself sequence for a small, clean-water, single-panel repair. Anything bigger or wetter belongs with a restoration crew.
1. Dry it out completely
The EPA recommends drying water-damaged areas within 24 to 48 hours if possible, using fans and dehumidifiers. Open the ceiling if you can, because a ceiling that looks dry on the surface can still be wet on the back and in the insulation. Confirm with a moisture meter, not by touch.
2. Prepare the room and your safety
Cover the floor and furniture with plastic. Wear safety glasses, gloves and an N95 respirator, since cutting wet board and insulation throws off dust and possible mold spores. Homes built decades ago can have older ceiling textures or materials that shouldn’t be sanded or broken up casually, so if your house is older and you plan to scrape or cut textured ceiling, have the material tested by a qualified lab first.
3. Cut out the damage
Mark a square or rectangle around the affected area, extending to the nearest joists if the damage is large. Cut along the lines with a drywall saw or utility knife and remove the wet board. If you find wet insulation, pull it out too. Fine Homebuilding notes that if drywall has bowed excessively between joists, the affected area should be removed and the opening patched.
4. Inspect what you uncovered
Look at the back of neighboring drywall, joists and insulation. Dark spotting or a musty smell means mold may be present, and the job has changed. Don’t close up a ceiling with mold behind it.
5. Install the patch
Screw a new piece of drywall of the same thickness to the joists or to wood backing strips. Tape the seams, apply joint compound in thin coats, let each coat dry, and sand lightly between coats.
6. Match texture, prime and paint
Match the existing texture (knockdown, orange peel or popcorn) with a texture spray or by hand. For paint, the Home Depot guide says to prime and paint the ceiling after replacing damaged drywall. For stains on drywall you are keeping, Fine Homebuilding’s sequence is to make sure the area is dry, remove loose material, apply stain-killing paint, patch, then repaint the entire ceiling. Painting the full ceiling, edge to edge, avoids the visible patch outline that spot painting leaves.
Ceiling leaks and mold
Mold needs moisture and time. The EPA’s worker and employer guide says wet building materials and furnishings should be removed, cleaned or dried within 24 to 48 hours, and that moisture control is the key to preventing mold. A ceiling leak that was found and fixed on day one rarely gets there. One that has been hidden above the drywall for weeks often has.
If you see small mold on a hard surface, a Massachusetts state homeowner guide says to use mild detergent and water, notes that the EPA does not recommend bleach-type biocides for this purpose, and calls for gloves, goggles and an N95 respirator. The same guide says that if you can see mold, you need to clean it up and fix the moisture problem whether or not you test.
Testing still has a place. It is useful when you smell mold but can’t see it, when an insurer or a buyer wants documentation, or when you need to know what a remediation plan must cover. Our published mold testing prices are $600 for a residential inspection and $975 for a commercial one, with additional samples at $75 (residential) and $95 (commercial) each. A residential remediation protocol is $1000. Details are on our mold testing page. If growth is already visible across a larger area, our mold remediation service handles containment and removal.

When to hire a professional
Call a restoration company, not a painter, when any of these apply:
- The ceiling is sagging or has already partly collapsed.
- The water came from a toilet overflow, sewage or any other contaminated source.
- Insulation above the ceiling is soaked.
- The damage spans more than one room or has spread into walls.
- The ceiling has stayed wet for more than 48 hours.
- There is a musty smell, or visible mold.
- You are managing a commercial property or a multi-unit building and need documentation for the owner or insurer.
Professionals bring structural drying equipment, moisture mapping and the ability to dry cavities you can’t see. That matters because the cost of a missed wet cavity shows up later as mold, warped framing or a stain that bleeds through new paint. Our water damage restoration team handles extraction, drying and monitoring, and if a ceiling leak came with a larger flood, our first 48 hours flood cleanup guide covers the wider response.
Insurance: what to document and ask
Most homeowner and renter policies cover sudden and accidental water damage, such as a burst pipe or a broken supply hose, according to the Texas Department of Insurance. Gradual leaks and neglected maintenance are treated differently, so the cause of your leak matters.
What to do:
- Report quickly. TDI says damage that was hidden from view usually has to be reported within days of when you first see it.
- Make an inventory. List damaged property and photograph or video it before repairs.
- Keep damaged items until the adjuster has looked at them.
- Keep receipts for emergency steps such as drying equipment, tarps and temporary repairs.
- Ask your insurer whether the policy covers the repair of the ceiling, the drying and the source of the leak, and what your deductible is.
If you rent, MoneyGeek advises telling your landlord immediately, since the structure is the landlord’s responsibility, while keeping your own documentation for personal belongings.
We work directly with insurance companies on claims, so the scope of work, photos and moisture readings are written up in the form an adjuster expects.
Our perspective
The most expensive ceiling repairs we see are the ones that were repainted too early. A stain gets covered in a weekend, and three months later the owner calls us because the drywall is soft, the insulation above is black and the claim window is complicated.
Our approach is to treat a ceiling as the visible end of a wet system. We locate the source, map moisture in the ceiling, the insulation and the walls it ran into, dry it with controlled equipment, and only then decide what gets replaced. We aim to respond within 24 to 48 hours because that is the window in which drying is most likely to save material and avoid mold.
What makes our work different is that one team carries a job from mitigation through reconstruction. The people who dried the structure also know what has to be rebuilt, which means fewer handoffs and no gap between the drying and the new drywall, texture and paint.
Dustin
Get the ceiling dried and rebuilt in one call
If your ceiling is sagging, stained and soft, or you can’t tell how far the water went, we can respond across Dallas-Fort Worth, including Tarrant, Dallas, Ellis and Johnson counties. Our crews handle water extraction, structural drying, mold testing and remediation, and the reconstruction and build-back that replaces the drywall, texture and paint, with direct coordination with your insurance company.

Start at Owl Restoration and tell us what you’re seeing. Photos of the ceiling and the room above help us plan the response before we arrive.
FAQ
Can I just paint over a water stain on the ceiling?
Only if the source is fixed, the drywall is completely dry and firm, and there is no sagging or mold. In that case, apply a stain-blocking primer before repainting the whole ceiling. Painting over damp or soft drywall hides the problem while the damage continues.
How long can a ceiling stay wet before mold grows?
The EPA advises drying water-damaged materials within 24 to 48 hours to prevent mold. After that window, the risk goes up, especially with wet insulation or poor airflow. If it’s been longer, have the area inspected before you close it up.
Should I cut a hole in a bulging ceiling?
If water is pooled in a bulge, a small drainage hole at the lowest point, with a bucket beneath, can prevent a sudden collapse. Keep clear of the area and shut off power to nearby fixtures first. Then call a professional if the ceiling is large or the water source is unknown.
Does homeowners insurance pay for ceiling water damage?
Most policies cover sudden and accidental water damage, such as a burst pipe, according to the Texas Department of Insurance. Coverage depends on the cause and your policy terms, so report the loss quickly and ask your insurer directly. We can help document the damage for the claim.
Do I need a mold test after a ceiling leak?
Not always. If you can see mold, it needs to be cleaned up and the moisture fixed regardless. Testing is helpful when you smell mold but can’t see it, or when you need documentation for an insurer, a landlord or a sale.
Sources
- Does Your Ceiling Have Water Damage? Here’s What To Do (Forbes)
- How to Repair a Water-Damaged Ceiling (The Home Depot)
- Assessing Water Damage to Gypsum Board, GA-231 (Gypsum Association)
- Mold Remediation in Schools and Commercial Buildings, Table 1 (EPA)
- Repairing Roofs and Ceilings (Partnership for Advancing Technology in Housing, DOE)
- Mold and Moisture (EPA)
- Mold: Worker and Employer Guide (EPA)
- Mold Cleanup, Repairs, and Excess Moisture Control (Massachusetts)
- Repairing Water Damage (Fine Homebuilding)
- When are water damage and mold covered by insurance? (Texas Department of Insurance)
- How to File a Renters Insurance Claim for Water Damage (MoneyGeek)
- Roof leak repair and costs